
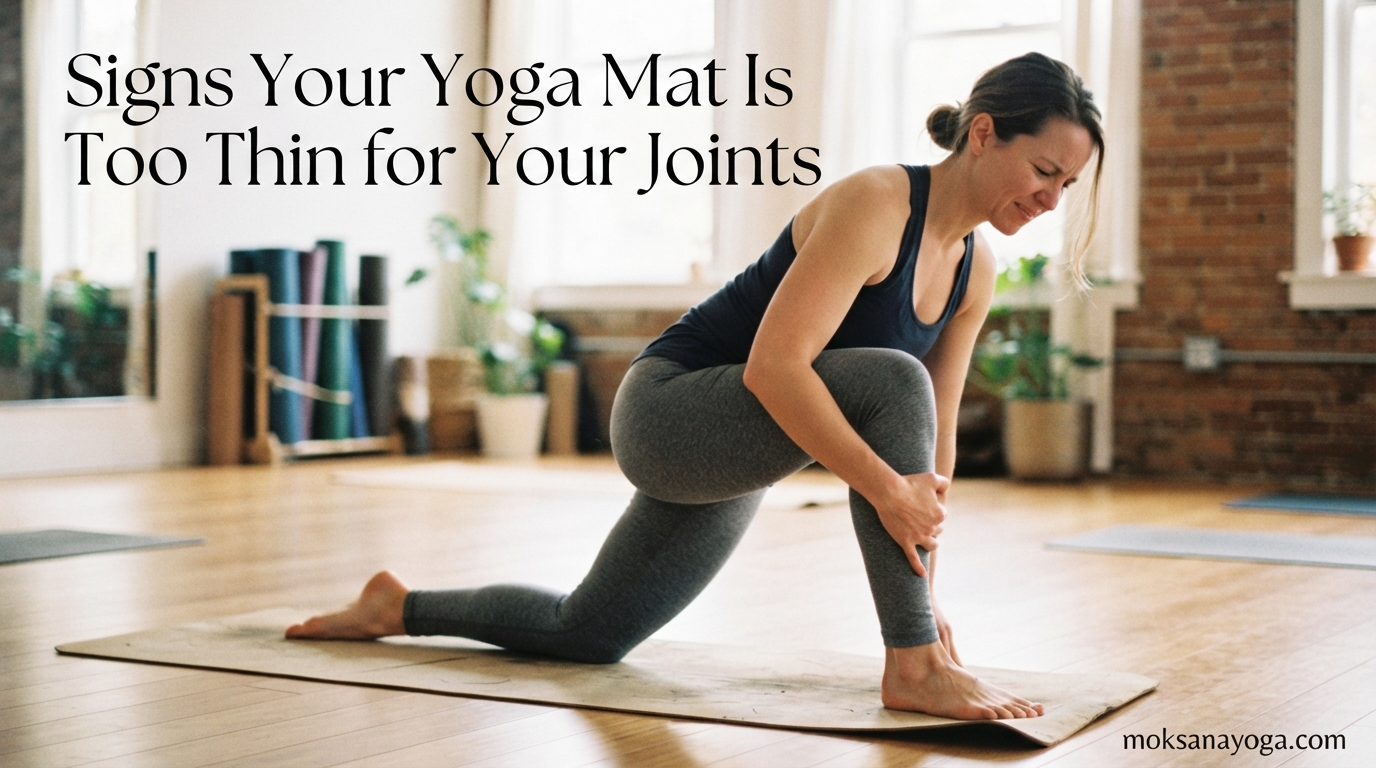
Picture this: you roll out your mat, settle into Tabletop pose, and your kneecaps slam into the hardwood floor like the mat is not even there. You shift, you adjust, you fold the mat over, and still, your joints ache for the rest of class. If this sounds familiar, you are not alone. Countless practitioners show up on Reddit’s r/yoga every week asking the same question: is my yoga mat too thin for my joints?
Recognizing the signs your yoga mat is too thin for your joints is one of the most practical skills you can develop as a yogi. The wrong thickness does not just cause discomfort during practice. It can create chronic knee pain, wrist strain, and even discourage beginners from continuing their practice altogether. Our team has spent years testing mats across hardwood floors, carpet studios, and outdoor surfaces, and the difference between 2mm and 5mm can completely change your experience on the mat.
In this guide, you will learn how to identify whether your current mat is causing joint pain, how to run five simple at-home tests to check your mat’s cushioning, what thickness you actually need for your body type and practice style, and what to do right now if you cannot replace your mat yet. Whether you are a beginner whose knees hurt after every session or an experienced practitioner wondering why your wrists ache in Downward-Facing Dog, this guide will help you pinpoint the problem and take action.
Table of Contents
The Quick Answer: Is Your Mat Too Thin?
Your yoga mat is too thin for your joints when it compresses completely under your body weight, allowing your bony prominences (kneecaps, wrists, elbows, ankles, hip bones) to press against the hard floor beneath. Most practitioners experience joint comfort at 4mm to 5mm thickness, while anyone with sensitive joints, bony knees, or pre-existing injuries typically needs 6mm or more for adequate cushioning.
Here are the eight warning signs we will cover in detail below:
- Knee pain during kneeling poses like Tabletop, Camel, and Low Lunge
- Wrist discomfort in Downward-Facing Dog and arm balances
- Feeling the floor through the mat (the bottoming out effect)
- Ankle and foot pain in seated and standing poses
- Elbow and forearm pain during plank and forearm stands
- Hip bone pressure in supine and seated postures
- Joint soreness that persists the day after practice
- Visible compression marks on your mat that do not rebound
If you checked even two or three of these signs, your mat thickness is likely working against your joints rather than supporting them. Let us break down each warning sign so you know exactly what to look for.
8 Signs Your Yoga Mat Is Too Thin for Your Joints
The clearest signs your yoga mat is too thin for your joints show up during specific poses and in specific parts of your body. Each sign below includes the poses that trigger it, why it happens, and what it tells you about your mat.
Sign 1: Knee Pain During Kneeling Poses
Knee pain is the number one complaint among practitioners on thin mats, and it shows up fastest in poses that place your full body weight directly on your kneecaps. Tabletop pose, Camel pose, Low Lunge, and any kneeling posture will reveal a thin mat immediately. If your mat is doing its job, your kneecaps should rest on cushioning that absorbs pressure without flattening completely. On a mat that is too thin, you feel the hard floor through the material within seconds of settling into the pose.
This happens because the kneecap is a bony prominence with very little natural padding. Your body weight concentrates onto a small surface area, creating intense pressure that a thin mat simply cannot absorb. Practitioners on Reddit report that switching from a 2mm mat to a 4mm mat resolved knee pain within a week for many users. If you have bony knees, even 4mm may not be enough. People with particularly sensitive joints often need 5.5mm to 6mm of cushioning to practice kneeling poses without discomfort.
Pay attention to whether the pain is sharp and immediate or dull and lingering. Sharp pain the moment your knee touches the mat signals that the cushioning is too thin or too compressed to protect your joint. Dull soreness that builds over a 60-minute class suggests your mat is borderline and fatiguing partway through your practice.
Sign 2: Wrist Discomfort in Downward-Facing Dog
Your wrists bear significant weight in Downward-Facing Dog, plank, and arm balances. A properly cushioned mat absorbs some of that pressure, distributing force across the heel of your palm rather than concentrating it in your wrist joint. When your mat is too thin, the hard floor pushes back against your hands with every ounce of force your body applies, and your wrist joints take the brunt of it.
Forum discussions on r/yoga are filled with practitioners who resolved chronic wrist pain simply by moving from a 3mm mat to a 5mm mat. The wrist joint is delicate, and repetitive compression on a hard surface can lead to inflammation that persists well after your practice ends. If your wrists ache during or after Downward-Facing Dog, your mat thickness is a likely culprit.
One important nuance: wrist pain can also stem from technique, such as dumping weight into the base of your palm instead of gripping with your fingers. Before blaming your mat entirely, check your hand placement. If your alignment is correct and you still feel wrist strain, thickness is the issue.
Sign 3: Feeling the Floor Through the Mat (Bottoming Out)
Bottoming out is the single clearest indicator that your mat is too thin for your joints. It happens when the mat material compresses completely under your weight, offering zero cushioning at the point of contact. You can feel the texture of the hardwood floor, the cold of the tile, or the grain of the concrete right through the mat.
This is not just a comfort problem. When a mat bottoms out, every ounce of force your body generates transfers directly to your joints. The mat becomes functionally invisible at that pressure point, providing no protective layer whatsoever. Bottoming out is especially common with low-density foam mats that feel thick in the store but compress to nothing under real body weight.
Think of it this way: a marshmallow and a piece of high-density rubber might be the same thickness, but the marshmallow compresses flat the moment you press on it. Many budget mats are essentially marshmallows. They advertise 6mm or 8mm of thickness, but the material is so soft that it offers no meaningful protection once your knee or wrist applies pressure. We will cover density versus thickness in depth later, but for now, understand that bottoming out is the symptom and low density is often the root cause.
Sign 4: Ankle and Foot Pain in Seated and Standing Poses
Ankle pain tends to fly under the radar compared to knee and wrist discomfort, but it is a reliable sign that your mat lacks adequate cushioning. Poses like Hero pose (Virasana), Thunderbolt (Vajrasana), and any seated posture where your ankles press into the floor will expose a thin mat quickly. The ankle bones are prominent and sensitive, with minimal flesh covering them to act as natural padding.
In standing poses, a too-thin mat can cause foot fatigue and discomfort because your feet absorb the hardness of the floor with every posture. This is especially noticeable during long holds in Warrior sequences or Tree pose. Your feet are designed to handle floor contact, but a thin mat on a hard surface creates a harsh, unforgiving landing that fatigues the small muscles and ligaments in your feet over a full practice.
Practitioners with prior ankle injuries or arthritis in the foot joints will notice this sign faster than anyone. If you have a history of ankle sprains or joint issues in your feet, even a 4mm mat may feel inadequate on hardwood or concrete floors.
Sign 5: Elbow and Forearm Pain in Plank and Forearm Stands
Forearm poses like Dolphin pose, forearm plank, and Pincha Mayurasana (Forearm Stand) place your entire body weight on a relatively small contact area: your forearms and elbows. A thin mat offers almost no protection here, and the hard floor presses directly against the sensitive tissue and bone of your forearm.
Elbow pain during these poses is distinct from muscle fatigue. Muscle fatigue feels like a burn that builds gradually and fades after the pose. Joint pain from a thin mat feels sharp, immediate, and localized to the bone or connective tissue. If your elbows hurt the moment they touch the mat in forearm plank, thickness is almost certainly the problem.
This sign is often overlooked because forearm poses are less common than kneeling or downward-facing poses in a typical class. But if your practice includes regular forearm work, inversions, or arm balance training, a thin mat will limit your ability to hold these poses long enough to build strength and skill.
Sign 6: Hip Bone Pressure in Supine and Seated Poses
Supine poses (lying on your back) and seated forward folds can reveal mat thinness through hip bone pressure. When you lie in Savasana or reclined postures, your hip bones, sacrum, and spine press into the mat. On a thin mat, you feel every ridge and seam of the floor beneath you, and bony areas like the sacrum and greater trochanter (the bony bump on the side of your hip) can become painful during long holds.
This is especially relevant for restorative yoga and Yin yoga, where poses are held for three to five minutes or longer. Even mild pressure becomes unbearable when sustained for that duration on a mat with inadequate cushioning. Many restorative practitioners use a folded blanket over their mat specifically because standard mat thickness is not enough for extended floor contact.
If you find yourself shifting and fidgeting during Savasana because your lower back or hips hurt, your mat is telling you something. A properly cushioned mat lets you relax completely in supine poses without awareness of the floor beneath you.
Sign 7: Joint Soreness That Persists After Practice
One of the most telling signs your yoga mat is too thin for your joints is soreness that lingers well after your practice ends. Muscle soreness is normal and expected after yoga, especially if you are building new strength or trying challenging poses. Joint soreness is different. It feels like a deep ache in the joint itself rather than fatigue in the surrounding muscles, and it can persist for 24 to 48 hours after class.
This delayed joint pain indicates that your mat failed to absorb enough impact during your practice, leaving your joints to absorb the repeated pressure of kneeling, pressing, and bearing weight on a hard surface. Over time, this repetitive strain can lead to inflammation, tendon irritation, and even minor injuries that take weeks to heal.
Track your post-practice soreness for a week. If your joints (not your muscles) consistently ache the day after yoga, and particularly if the same joints hurt every time (knees, wrists, elbows), your mat thickness is a primary suspect. Many practitioners report that upgrading to a thicker, higher-density mat eliminated persistent joint soreness within days.
Sign 8: Visible Compression Marks That Do Not Rebound
Your mat’s surface tells a physical story about its cushioning ability. If you see permanent indentations where your hands and knees typically go during practice, the material has lost its rebound capacity. Foam and rubber should compress under pressure and then return to their original shape when the pressure is removed. When a mat stops rebounding, it has effectively become thinner than its advertised measurement.
This sign is common in mats that are several months old, particularly budget TPE and NBR foam mats. The material breaks down with repeated compression, heat, and sweat exposure, losing the cellular structure that provides cushioning. A mat that started at 5mm may effectively be 2mm in the areas where you place your hands and knees most often.
Hugger Mugger’s research on mat lifespan shows that internal structure collapse is the primary reason mats stop protecting joints over time, even when the mat looks fine from a distance. Run your hand across your mat’s surface. If you feel dips, grooves, or areas that are noticeably softer or harder than the rest of the mat, the cushioning is compromised and the mat needs replacement.
What Bottoming Out Means and Why It Matters
Bottoming out is the technical term for what happens when your yoga mat compresses completely under your body weight, offering zero cushioning at the point of contact. Think of it as the mat giving up. No matter how thick the material claims to be, if it bottoms out under your weight, it is functionally too thin for your joints.
The physics are straightforward. Your body weight creates force. That force travels through your bones and joints into the mat. A properly cushioned mat absorbs that force by compressing partway, then rebounds when you shift or lift. A mat that bottoms out compresses completely, so the remaining force transfers straight through the material into the hard floor beneath. Your joints end up absorbing the impact the mat was supposed to handle.
This is why density matters more than thickness. A 4mm high-density natural rubber mat can resist compression far better than an 8mm low-density foam mat. The rubber has a tighter cellular structure that pushes back against pressure, while the soft foam collapses flat. When you are shopping for a mat that will protect your joints, looking at thickness alone will mislead you. We will explore the density versus thickness distinction in detail in a later section.
How to Test Your Mat at Home: 5 Simple Checks
You do not need to guess whether your mat is too thin. These five at-home tests will give you a definitive answer in under five minutes. Each test targets a different aspect of cushioning and joint protection, so run all five for a complete assessment.
Test 1: The Knee Press Test
Kneel on your mat on a hard floor (hardwood, tile, or concrete, not carpet). Lower your weight slowly onto one knee, then the other. If you feel the floor through the mat within two seconds of applying full weight, your mat is bottoming out and too thin for kneeling poses. A mat with adequate cushioning should let you rest your full weight on both knees for at least 30 seconds without floor contact.
For a more sensitive version of this test, place your mat on a harder surface if available. A mat that feels adequate on carpet may bottom out immediately on hardwood. Since you cannot always predict what floor surface you will practice on, test on the hardest floor you encounter regularly.
Test 2: The Fist Compression Test
Make a fist and press it firmly into your mat, leaning your body weight into it. Watch how far the mat compresses. If your knuckles touch the floor through the mat, the cushioning is insufficient. If the mat compresses more than 60 percent of its thickness before resisting, it is too soft to protect your joints during practice.
This test simulates what happens when your hands, knees, or elbows bear weight on the mat. A high-density mat should compress only 30 to 40 percent under firm pressure before pushing back. This resistance is what protects your joints during weight-bearing poses.
Test 3: The Downward Dog Test
Move into Downward-Facing Dog on your mat over a hard floor. Hold the pose for 30 seconds and pay attention to your wrists. If you feel the floor pressing back through the mat into the heels of your palms, your mat lacks the cushioning needed for sustained weight-bearing poses. Your wrists should feel supported, not compressed.
This test is particularly useful because it replicates real practice conditions. The downward dog position applies continuous, distributed pressure through your hands, which is exactly what your mat needs to handle during a full yoga session.
Test 4: The Floor Feel Test
Lie flat on your back on the mat over a hard floor. Close your eyes and scan your body from head to toe. Can you feel the texture, temperature, or hardness of the floor through the mat? If your spine, sacrum, shoulder blades, or hips register the floor beneath you, your mat is too thin for supine poses and Savasana.
Properly cushioned mats create a barrier that lets you forget the floor entirely. You should feel only the mat’s surface, not the ground beneath it. If cold or hardness from the floor reaches your body, the mat is failing its primary protective function.
Test 5: The Rebound Check
Press your thumb firmly into your mat for five seconds, then release. Does the indentation spring back immediately? If the dent remains visible for more than a few seconds, the material has lost its rebound capacity. A mat that cannot rebound from thumb pressure will definitely not protect your joints from full body weight during practice.
Check multiple areas of the mat, especially the spots where you place your hands and knees most often. These high-wear zones degrade faster than the edges and corners. If the center of your mat fails this test but the edges still rebound, your mat has uneven wear and needs replacement.
Ideal Yoga Mat Thickness for Joint Protection
Yoga mat thickness ranges from ultralight 1.5mm travel mats to cushioned 8mm or even 10mm therapy mats. Each thickness serves a different purpose, and the right choice depends on your practice style, body type, and the surface you practice on. Here is a breakdown of what each thickness range offers for joint protection.
1.5mm to 2mm: Travel Mats
These ultrathin mats are designed for portability, not joint protection. A 2mm mat is too thin for almost anyone practicing on hardwood or tile floors, especially if you have sensitive joints or bony knees. Travel mats work well when layered over a studio mat or used on carpet, which provides the actual cushioning. Using a 2mm mat directly on a hard floor will almost certainly cause joint discomfort in kneeling and weight-bearing poses.
The exception is experienced practitioners with strong joints who prioritize ground connection over cushioning. Advanced yogis sometimes prefer thin mats because they offer maximum stability and proprioceptive feedback (the ability to feel your connection to the ground). But for most practitioners, especially beginners, 2mm is too thin.
3mm to 3.5mm: Standard Studio Mats
This is the thickness you will find at most yoga studios. It provides a baseline level of cushioning that works for many practitioners, particularly those with average body weight practicing on carpeted floors or who do not have pre-existing joint issues. However, on hardwood or concrete, 3mm often bottoms out during kneeling poses and long-held wrist-bearing postures.
If you are lightweight (under 140 pounds) and practice primarily standing and seated poses without extensive kneeling, 3mm may suffice. Heavier practitioners and anyone with knee sensitivity will likely find 3mm inadequate on hard surfaces.
4mm to 5mm: The Sweet Spot for Most Practitioners
The 4mm to 5mm range is where most practitioners find their ideal balance between cushioning and stability. A 5mm mat provides enough padding for kneeling poses and wrist-bearing postures on hardwood floors without sacrificing the ground connection needed for balance poses. This thickness range works well for vinyasa, hatha, and general yoga practices.
If you can only own one mat, 5mm is the safest choice for joint protection across the widest range of practice styles and floor surfaces. The key is ensuring the mat is made from dense material (natural rubber or high-density TPE) rather than soft foam, which would bottom out despite the adequate thickness.
6mm and Above: For Sensitive Joints and Specific Conditions
Mats 6mm and thicker are designed for practitioners with sensitive joints, prior injuries, arthritis, or anyone who needs maximum cushioning. They excel in restorative yoga, Yin yoga, prenatal yoga, and rehabilitation settings where comfort takes priority over stability and ground connection.
Older practitioners (50 and above) consistently report needing 6mm or more for comfortable practice, according to forum discussions. Heavier practitioners (200 pounds and above) also benefit from 6mm and up, because their additional body weight compresses thinner mats more aggressively. The trade-off is that very thick mats (8mm and above) can feel unstable during balance poses, so some practitioners use a thick mat for floor work and a thinner mat for standing sequences.
Thickness by Yoga Style
Different yoga styles stress your joints in different ways. Here is a quick guide to recommended thickness by practice type:
- Vinyasa and power yoga: 4mm to 5mm. These fast-paced styles need a balance of cushioning and stability for frequent transitions.
- Hatha and beginner yoga: 5mm to 6mm. Beginners benefit from extra cushioning while building strength and learning alignment.
- Restorative and Yin yoga: 6mm or more. Long-held floor poses demand maximum cushioning for joints.
- Hot yoga: 3mm to 5mm. Grip matters more than thickness here, but do not go below 3mm or your joints will suffer during floor sequences.
- Ashtanga: 4mm to 5mm. This physically demanding practice needs durable cushioning for jump-throughs and weight-bearing poses.
- Prenatal yoga: 6mm or more. Extra cushioning supports changing bodies and sensitive joints during pregnancy.
Body Weight Considerations
Your body weight directly affects how much your mat compresses during practice. Heavier practitioners generate more force against the mat, causing thinner materials to bottom out faster. Reddit users consistently report that at 200 pounds and above, a 4mm mat feels like a 2mm mat after compression. If you weigh 200 pounds or more, consider starting at 5mm or 6mm and choosing high-density materials that resist compression.
Lighter practitioners (under 140 pounds) can often use thinner mats comfortably because they generate less compressive force. A 3mm mat may provide adequate cushioning for a lightweight practitioner on carpet, while the same mat would be painful for a heavier practitioner on hardwood.
Floor Surface Considerations
The surface beneath your mat matters as much as the mat itself. Hardwood, tile, and concrete floors offer zero give, meaning your mat must absorb all the impact on its own. Carpet provides additional cushioning, allowing thinner mats to feel comfortable. Outdoor surfaces like grass and sand are naturally soft but uneven, which creates different challenges.
If you practice exclusively on hardwood or concrete, add 1mm to 2mm to whatever thickness you were considering. A practitioner comfortable on 4mm over carpet may need 5mm or 6mm on hardwood for the same level of joint protection. If you practice on carpet, you can often get away with a thinner mat because the carpet acts as a secondary cushioning layer.
Density vs. Thickness: Why Both Matter for Your Joints
If thickness were the only factor in joint protection, every 5mm mat would perform identically. But any experienced yogi knows that a 5mm natural rubber mat feels completely different from a 5mm NBR foam mat. The difference is density, and understanding this concept will make you a smarter mat buyer and a more informed practitioner.
Density refers to how tightly packed the material’s cellular structure is. High-density materials have small, tightly compressed cells that resist deformation under pressure. Low-density materials have larger, softer cells that compress easily. Two mats of identical thickness can have wildly different cushioning properties because their density differs dramatically.
This is why a 4mm dense natural rubber mat can outperform a 6mm cheap foam mat for joint protection. The rubber resists compression, maintaining its cushioning even under full body weight. The foam compresses flat, offering no protection at the exact moment your joints need it most. When practitioners say their expensive mat bottomed out after six months, they are usually describing a density problem, not a thickness problem.
How to Check Density Before You Buy
If you can test a mat in person, press your thumb into it firmly. A high-density mat will resist your pressure and rebound instantly. A low-density mat will compress deeply and slowly. If you are buying online, look for material specifications: natural rubber and high-density PVC tend to have the best density ratings, while NBR foam and budget TPE are typically the softest and least dense options.
Weight is another density indicator. A high-density mat of a given thickness will weigh significantly more than a low-density mat of the same thickness. If two 5mm mats are listed and one weighs 2 pounds while the other weighs 5 pounds, the heavier mat almost certainly has higher density and better compression resistance.
Best Yoga Mat Materials for Joint Support
Material choice affects both density and durability, which in turn determine how well your mat protects your joints over time. Here is how the five most common yoga mat materials compare for joint support.
Natural Rubber
Natural rubber offers excellent density, grip, and durability, making it one of the best materials for joint protection. A 4mm or 5mm natural rubber mat provides firm but supportive cushioning that resists bottoming out even under heavier body weight. The material has natural rebound properties, meaning it maintains its cushioning over years of daily practice. The downsides are weight (rubber mats are heavy), latex allergy concerns, and a rubber smell that fades over time.
TPE (Thermal Plastic Elastomer)
TPE is a synthetic material common in mid-range mats. Its density varies widely depending on manufacturing quality. High-density TPE can provide good cushioning at 5mm, but budget TPE mats tend to be soft and compress easily. TPE is lightweight, affordable, and free of latex and PVC, making it popular for practitioners who want a balance of performance and portability. Check reviews specifically for compression resistance before buying a TPE mat.
PVC
PVC (polyvinyl chloride) is the traditional yoga mat material used in many studio mats. High-quality PVC offers decent density and excellent durability, with some mats lasting over a decade. However, PVC is less eco-friendly than other options and can be slippery when sweaty unless it has a textured surface treatment. For joint protection, high-density PVC performs adequately at 5mm thickness but is generally outperformed by natural rubber at the same thickness.
Cork and Rubber Composite
Cork-top mats with a natural rubber base combine excellent grip (cork gets stickier as you sweat) with the joint protection of dense rubber backing. These mats typically run 4mm to 5mm thick and perform well for joint support because the rubber layer provides compression resistance. Cork is naturally antimicrobial and sustainable, appealing to eco-conscious practitioners. The main drawback is that cork surfaces can feel firm compared to foam, so they are best paired with at least 4mm of rubber backing.
NBR (Nitrile Butadiene Rubber) Foam
NBR foam is the softest and thickest material commonly found in budget yoga mats, often advertised at 6mm to 15mm thickness. While these mats feel plush initially, the very low density means they compress flat under body weight almost immediately. For joint protection, NBR is generally the worst performer despite its impressive thickness numbers. It works as a beginner mat or for light stretching, but it will bottom out during any weight-bearing or kneeling pose.
What to Do If Your Mat Is Too Thin Without Buying a New One
Not everyone can replace their mat immediately. Budget constraints, travel situations, or waiting for a specific mat to ship can leave you practicing on a mat you know is too thin. Here are four practical workarounds that will protect your joints until you can upgrade.
Temporary Fix 1: Fold a Blanket Under Your Knees
A folded Mexican blanket or firm yoga blanket under your mat at the knee zone adds instant cushioning for kneeling poses. Position the blanket where your knees land in Tabletop, Camel, and Low Lunge. This is the quickest, most effective fix for knee pain on a thin mat, and many studios keep blankets available specifically for this purpose.
The blanket should be firm enough to provide structured support, not so soft that it compresses flat like the mat itself. Fold it to the thickness that eliminates knee contact with the floor, typically two to four layers depending on the blanket material.
Temporary Fix 2: Double-Layer Your Mat
Stacking two mats creates a thicker practice surface without buying anything new. If you have an old thin mat and a newer thin mat, layering them doubles your cushioning for kneeling and floor poses. This is a popular budget solution mentioned frequently in forum discussions, particularly among college students and home practitioners.
The downside is that double-layering can make the surface slightly less stable for balance poses. If you try this, use a non-slip surface between the two mats to prevent sliding, and be aware that the top mat may shift during vigorous vinyasa sequences.
Temporary Fix 3: Use Yoga Blocks, Bolsters, and Props
Yoga props were designed to solve joint problems long before thick mats existed. A bolster under the knees in Savasana, a folded blanket under the sitz bones in seated poses, and yoga blocks under the hands in standing forward folds can all reduce joint pressure on a thin mat. These modifications are not just for beginners. They are legitimate practice tools that allow you to practice safely regardless of mat thickness.
If you attend a studio, ask the teacher about prop modifications for poses that hurt your joints. Most teachers are delighted to help you modify rather than see you practice through pain.
Temporary Fix 4: Modify Poses to Reduce Joint Pressure
Sometimes the solution is not more cushioning but less pressure on the joint itself. In Tabletop, curl your toes under to lift your knees slightly off the mat. In Camel pose, place your hands on your lower back instead of reaching for your heels, reducing the depth of the backbend and the pressure on your knees. In Downward-Facing Dog, bend your knees slightly to shift weight away from your wrists.
These modifications reduce joint load without requiring any additional equipment. They also help you build strength and alignment awareness that will serve you well even after you upgrade to a thicker mat.
When to Replace vs. When to Modify
Temporary fixes are meant to be temporary. If your mat is visibly worn, has permanent compression marks, or is causing joint pain that persists after practice, replacement is the right answer. Modifications and props can extend the life of a borderline mat, but they cannot fix a mat that has fundamentally lost its cushioning capacity.
As a general rule, if you have been modifying for more than a few weeks and your joints still hurt, replace the mat. Continuing to practice on a mat that causes joint pain risks chronic inflammation and injury that will cost far more than a quality mat.
FAQs
Is 2mm too thin for a yoga mat?
Yes, 2mm is too thin for most practitioners, especially on hardwood or tile floors. A 2mm travel mat works only when layered over a studio mat or used on carpet, which provides the actual cushioning. For direct use on hard floors, even practitioners without joint sensitivity typically need at least 4mm.
Can a yoga mat be too thin?
Absolutely. A yoga mat can be too thin when it fails to provide adequate cushioning, causing your knees, wrists, ankles, or elbows to press against or feel the hard floor beneath the mat during poses like Tabletop, Camel, or Downward-Facing Dog. If you feel the floor through your mat during any pose, it is too thin for your joints.
Is a thicker yoga mat better for bad knees?
A thicker mat is generally better for bad knees, but density matters as much as thickness. A 5mm high-density natural rubber mat will protect your knees better than an 8mm low-density foam mat that bottoms out. For sensitive knees, aim for 5mm to 6mm in a dense material like natural rubber or high-density TPE.
Is it better to have a thicker or thinner yoga mat?
It depends on your practice style, body type, and the floor surface. Thicker mats (5mm to 6mm) protect joints better during kneeling and floor poses, making them ideal for beginners, restorative yoga, and anyone with sensitive joints. Thinner mats (3mm to 4mm) offer better stability and ground connection for balance poses and advanced practitioners who prioritize proprioceptive feedback.
Why do people use thin yoga mats?
Experienced practitioners often prefer thin mats for better stability in balance poses, stronger ground connection for alignment work, lighter weight for travel, and superior grip during hot yoga. Thin mats also last longer in high-density materials because there is less foam to compress and break down. Advanced yogis with strong joints and refined alignment may not need the extra cushioning that beginners require.
Is a yoga mat good for your joints?
A properly chosen yoga mat protects your joints by providing a cushioning layer between your body and the hard floor. However, a mat that is too thin, too low in density, or worn out can actually harm your joints by allowing repeated impact against hard surfaces. The right mat at the right thickness and density supports joint health throughout your practice.
What yoga mat thickness is best for scoliosis?
Practitioners with scoliosis often benefit from a thicker mat (5mm to 6mm) with high-density cushioning to accommodate spinal asymmetry and reduce pressure on uneven contact points. Natural rubber mats at 5mm tend to work well because they provide firm, even support without bottoming out. Pairing the mat with props like bolsters and blankets can further customize support for spinal curves.
Conclusion: Listen to Your Joints
Recognizing the signs your yoga mat is too thin for your joints comes down to paying attention to what your body tells you during and after practice. Knee pain in Tabletop, wrist ache in Downward-Facing Dog, feeling the floor through your mat, and joint soreness that lingers the next day are all clear signals that your mat is not providing the protection your joints need. Run the five at-home tests, consider your practice style and body type, and choose a mat with both adequate thickness (4mm to 6mm for most practitioners) and high density to resist compression. Your joints are the foundation of a lifelong yoga practice, and the right mat is the protective layer that keeps that foundation strong.