
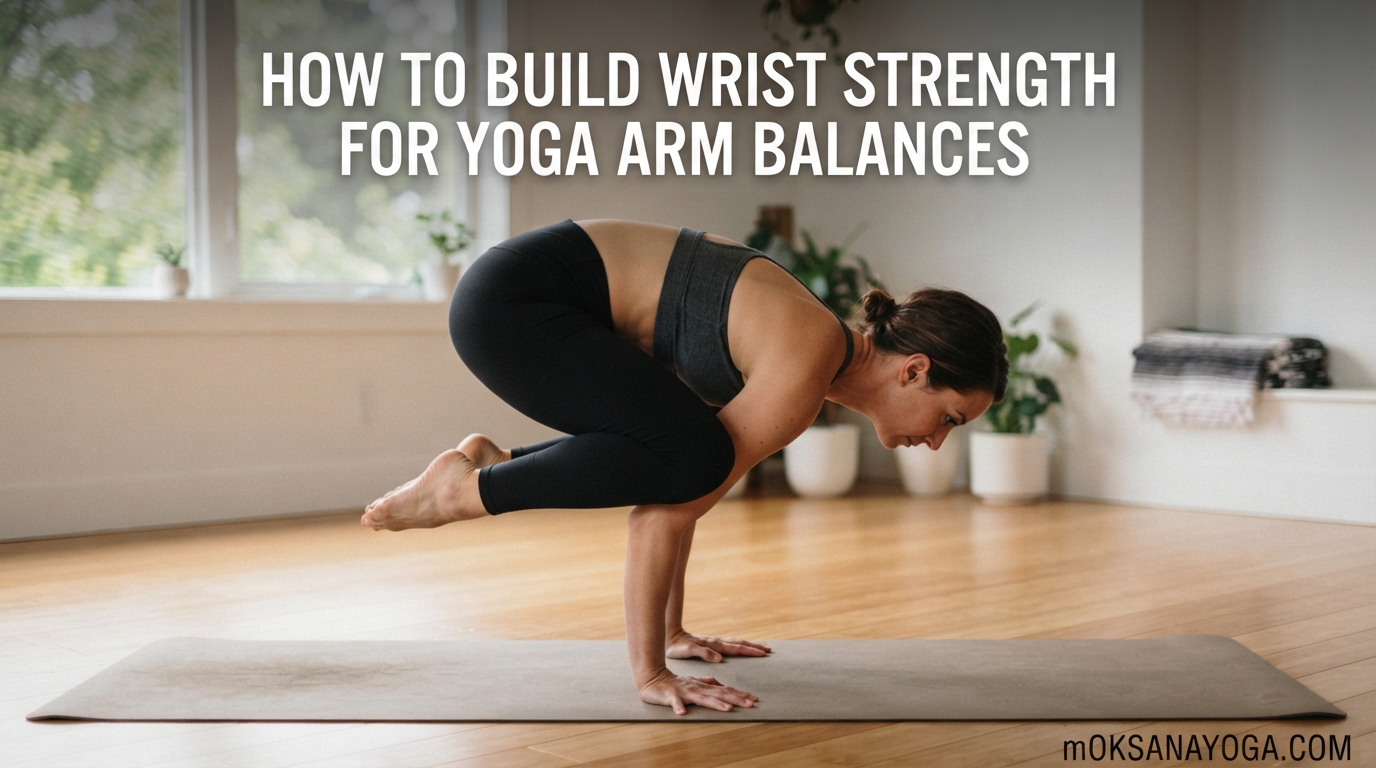
If you have ever tried Crow Pose and felt your wrists screaming, you are not alone. Wrist pain is the number one reason people give up on arm balances before they even get started. The good news is that wrist strength is not something you are simply born with or without. It is a skill you can build with the right exercises, proper alignment, and consistent practice.
In this guide, I will walk you through everything you need to know about how to build wrist strength for yoga arm balances. We will cover wrist anatomy, essential warm-up exercises, proper hand placement, a progressive strengthening routine, common mistakes, and modifications for sensitive wrists. Whether you are a beginner whose wrists hurt in Downward Dog or an intermediate practitioner working toward Handstand, this guide gives you a clear path forward.
Many yogis on forums like Reddit’s r/yoga community report that their wrists hurt during basic poses like tabletop and Downward-Facing Dog. That pain holds them back from trying arm balances entirely. Our team has put together this comprehensive resource so you can stop avoiding arm balances and start building the wrist resilience you need to practice them safely.
Table of Contents
Understanding Wrist Anatomy for Yoga
Your wrist is an intricate structure that was designed for fine motor skills, not for supporting your full body weight. When you practice arm balances, you are asking a joint built for gripping and grasping to suddenly bear 100 to 200 pounds of pressure. Understanding what is happening inside your wrist helps you train it safely.
The wrist is made up of eight small bones called carpals. These bones sit between your forearm bones (the radius and ulna) and the metacarpals of your hand. The carpals are held together by a network of ligaments and connective tissue, including the flexor and extensor retinacula. These are thick bands of fascia that keep your tendons in place as they pass from your forearm into your hand.
When you place your hands flat on the mat for an arm balance, you are asking your wrist into deep extension. Extension means the back of your hand moves toward your forearm. Most people spend their days with their wrists in a neutral or slightly flexed position, like when typing on a keyboard. Suddenly demanding 90 degrees of wrist extension under load is a recipe for pain if your wrists are not prepared.
Wrist flexion, on the other hand, is when your palm moves toward the underside of your forearm. You use flexion when making a fist or gripping something. For arm balances, extension is where the demand and the danger lie. The tendons that cross the front of your wrist get stretched tight, while the structures on the back of your wrist get compressed.
The muscles that control your wrist actually live in your forearm. Long tendons reach down from those forearm muscles to move your wrist and fingers. This is why building wrist strength really means building forearm strength. When you strengthen your forearms, you give your wrists the muscular support they need to handle the load of arm balance poses.
Essential Wrist Warm-Up Exercises
How to build strength in wrists for yoga starts with a proper warm-up. You should never jump straight into an arm balance with cold wrists. I recommend spending 3 to 5 minutes on these warm-up exercises before every practice session. Here are seven essential wrist warm-up moves that prepare your joints, tendons, and ligaments for weight-bearing.
1. Wrist Circles: Extend your arms in front of you and slowly rotate your wrists in clockwise circles. Make the circles as wide as possible, feeling the full range of motion. Do 10 circles clockwise, then 10 counterclockwise. This lubricates the wrist joint and warms up the synovial fluid inside.
2. Wrist Flexion and Extension Stretch: Reach one arm forward with your palm facing up. Use your other hand to gently pull your fingers back toward your forearm, stretching the underside of your wrist. Hold for 15 seconds, then push your fingers down toward the floor to stretch the top of your wrist. Repeat on both sides.
3. Prayer Pose Stretch: Bring your palms together in front of your chest in prayer position. Slowly lower your hands toward your belly button while keeping your palms pressed together. You will feel a deep stretch across the inside of your wrists. Hold for 20 seconds, then gently press your palms apart and round your fingers for a counter-stretch.
4. Tabletop Weight Shifts: Come to a tabletop position with your hands directly under your shoulders. Slowly shift your weight forward over your fingertips, then back over the heels of your hands. Repeat 8 to 10 times. This introduces your wrists to weight-bearing in a controlled, gentle way.
5. Finger Spreads: Place your hands flat on the mat with fingers wide apart. Lift each finger one at a time, starting with your thumb, then set it back down. Move through all five fingers on each hand. This activates the small muscles in your hands and builds the grip strength you need for arm balances.
6. Wrist Curls Against the Wall: Stand facing a wall and place your palms flat against it at shoulder height. Lean your body weight forward, pressing into the wall. Slowly curl your fingers and lift your palms slightly off the wall, then press back down. Do 10 repetitions. This builds forearm strength in a controlled position.
7. Reverse Prayer Hands: Bring your hands behind your back with your palms pressed together, fingers pointing down. If you can, slowly rotate your fingers to point upward between your shoulder blades. This stretches the front of your wrists and forearms, opening up the tissues that get tight from gripping the mat.
Forum discussions from yoga communities confirm that consistent daily warm-ups make a real difference. Practitioners who warm up properly report far less wrist pain than those who skip it. One Reddit user mentioned that after adding just five minutes of wrist prep before practice, their wrist pain in Downward Dog disappeared within three weeks.
Hand Placement and Weight Distribution
Proper hand placement is just as important as wrist strength. You can have strong wrists and still experience pain if your alignment is off. The way you distribute weight through your hands determines whether your wrist joints are supported or strained. Here are five steps to proper hand placement for arm balances.
Step 1: Spread Your Fingers Wide. Place your hands on the mat with your fingers spread as wide as comfortably possible. Your middle finger should point straight forward. A wider hand base gives you more surface area to distribute weight.
Step 2: Press Through the Knuckles. Press down firmly through the knuckles at the base of each finger. This is what yoga teachers call Hasta Bandha, or the hand lock. Think of it like creating a suction cup with your palm, where the center of your palm slightly lifts while the perimeter stays grounded.
Step 3: Root the Index Finger Knuckle. Pay special attention to the knuckle at the base of your index finger and the base of your thumb. These two points are the most likely to lift off the mat, which dumps all your weight onto the outer wrist. Press them down firmly.
Step 4: Distribute Weight Evenly. Your weight should spread across the whole hand, not just the heel of the palm. Think of your hand as having four corners: the base of the index finger, the base of the pinky, the inner heel of the palm, and the outer heel. Press all four corners down evenly.
Step 5: Engage the Fingertips. Grip the mat lightly with your fingertips, like a cat pressing its paws into the ground. This engages your forearm muscles and creates active support for your wrist joint. The more your fingertips grip, the less weight dumps passively into the heel of your hand.
The most common alignment mistake is what teachers call “cupping the hand.” This happens when the knuckle at the base of your index finger lifts off the mat and all your weight collapses into the heel of your palm. That position puts maximum pressure directly on the wrist joint with zero muscular support. Always check that your knuckles stay grounded.
Progressive Wrist Strengthening Routine
Building wrist strength takes a progressive approach. You cannot jump from zero experience to holding Crow Pose on day one. Your wrists need gradual loading to build the tendon strength and joint resilience required for advanced arm balances. Here is a three-phase progression I recommend, based on my experience working with yoga students at different levels.
Phase 1: Beginner (Weeks 1 to 4)
If your wrists currently hurt in Downward Dog or tabletop, start here. Your goal is to build a baseline of wrist tolerance and forearm strength before attempting any arm balance.
Tabletop Holds: Hold a tabletop position for 30 seconds with your weight evenly distributed through your hands. Rest for 30 seconds and repeat 3 times. Do this daily.
Wall Planks: Stand facing a wall and place your hands flat against it at shoulder height. Lean your body weight into your hands, pressing firmly through your knuckles. Hold for 30 seconds, rest, and repeat 3 times. This builds wrist extension tolerance with less load than floor planks.
Wall Push-Ups: From the wall plank position, bend your elbows and bring your chest toward the wall, then press back out. Do 2 sets of 10 repetitions. This strengthens your forearms and shoulders together.
Finger Squeezes: Hold a soft ball or rolled-up sock in your hand and squeeze for 5 seconds. Release and repeat 15 times per hand. This builds grip strength, which translates directly to better wrist stability.
Phase 2: Intermediate (Weeks 5 to 12)
Once tabletop and wall exercises feel easy, you are ready to add more load. At this stage, you are building toward full body weight on your hands.
Plank Holds: Hold a high plank position with your hands flat on the mat. Start with 20 seconds and work up to 60 seconds. Focus on pressing through your knuckles and gripping the mat with your fingertips. Do 3 sets.
Downward Dog Holds: Hold Downward-Facing Dog for 30 to 60 seconds. Pay attention to hand placement, spreading your fingers wide and rooting through all four corners of each palm. Do 3 sets.
Knee-To-Nose in Plank: From a high plank, draw your right knee toward your nose, engaging your core. Hold for 3 seconds, return to plank, and switch sides. Do 5 repetitions per side. This adds dynamic load to your wrists while building core strength.
Chaturanga with Knees Down: Lower your knees to the mat and practice lowering halfway down in Chaturanga alignment. Keep your elbows hugged in and your shoulders away from your ears. Do 2 sets of 8 repetitions.
Phase 3: Advanced (Weeks 13 and Beyond)
At this stage, your wrists are ready for arm balance prep. You have built the foundational strength needed to safely introduce poses that place your full body weight on your hands.
Crow Pose Prep: Stand on a block and place your hands on the mat. Bend your elbows slightly and rest your knees on the backs of your upper arms. Shift your weight forward slowly, lifting one foot off the ground at a time. Hold for 10 seconds and release. Repeat 5 times.
Full Chaturanga: Practice lowering from high plank to Chaturanga with your knees lifted. Keep your elbows at a 90-degree angle, hugging them against your ribs. Do 3 sets of 5 repetitions with rest in between.
Forearm Plank to Dolphin: From forearm plank, lift your hips up and back into Dolphin Pose. This builds the shoulder and forearm strength needed for Pincha Mayurasana (forearm stand). Hold Dolphin for 30 seconds and repeat 3 times.
Handstand Against the Wall: Place your hands a few inches from a wall and kick up into a supported handstand. Hold for 15 seconds, focusing on pressing strongly through your hands. Rest and repeat 3 times.
Forum members from the yoga community on Reddit recommend supplementing this routine with reverse wrist curls and dead hangs from a pull-up bar. These exercises build forearm strength from different angles and accelerate your progress. Several practitioners also mention that adding Pilates classes helped them build the arm and wrist strength they needed for advanced arm balances.
Common Mistakes That Cause Wrist Pain
Even with a good strengthening routine, certain habits can sabotage your wrist health. Many of these mistakes are subtle, and you might not realize you are making them until pain shows up. Here are the most common mistakes that cause wrist pain in yoga arm balances.
Cupping the Hand: As I mentioned earlier, letting the index finger knuckle lift off the mat dumps all your weight into the heel of your palm. This is the single most common cause of wrist pain in yoga. Always check that all four corners of your hand stay grounded.
Skipping the Warm-Up: Walking into a class and immediately doing weight-bearing poses on cold wrists is asking for trouble. Cold tendons and ligaments are less elastic and more prone to strain. Spend at least three minutes on wrist warm-ups before any practice that includes arm balances.
Practicing Through Sharp Pain: There is a difference between muscle fatigue and joint pain. Muscle soreness in your forearms is normal and expected when building strength. Sharp pain in your wrist joint itself is a warning sign that something is wrong. If you feel sharp pain, stop immediately and modify the pose.
Going Too Fast: Trying advanced arm balances before your wrists are ready leads to injury. Many people want to skip the foundational work and jump straight into Crow Pose or Handstand. This impatience is how wrist injuries happen. Respect the progression and give your body time to adapt.
Forgetting the Fingertips: Passive hands lead to passive wrists. If you let your hands go limp on the mat, all the weight dumps into your wrist joint. Active hands, with fingertips gripping the mat, engage your forearm muscles and protect your wrists.
Ignoring Core Engagement: Your core plays a huge role in arm balances. When your core is engaged, it lifts weight out of your hands and wrists. A weak core means your wrists bear more load than necessary. Always draw your navel in and engage your abdominal muscles during arm balance practice.
Modifications for Sensitive Wrists
If you currently have wrist pain or are recovering from an injury, you do not have to skip arm balance practice entirely. There are effective modifications that reduce wrist load while still building strength and stability. Many experienced yogis use these modifications regularly.
Fists Instead of Flat Palms: Instead of placing your hands flat, make gentle fists and rest on the flat surface of your knuckles. This keeps your wrist in a neutral position and eliminates wrist extension entirely. You can use this modification in plank, Downward Dog, and tabletop. Reddit users report this is one of the most effective modifications for wrist pain.
Forearm Variations: Replace weight-bearing hand poses with their forearm equivalents. Dolphin Pose replaces Downward Dog. Forearm plank replaces high plank. Dolphin push-ups replace Chaturanga. These variations build incredible shoulder and core strength without loading your wrists.
Use a Wedge or Folded Mat: Roll up the front of your yoga mat or place a folded towel under the heel of your palm. This reduces the angle of wrist extension, making weight-bearing poses more comfortable. You can also purchase yoga wedges designed specifically for this purpose.
Fingers Pointing Backward: In tabletop or plank, turn your fingers to point backward toward your knees. This changes the angle of wrist extension and can relieve pressure for some practitioners. It feels strange at first but can be a game-changer for wrist comfort.
Reduce Hold Times: Instead of holding poses for 30 seconds, hold for 10 seconds and rest. Build up gradually as your wrists adapt. It is better to do more short holds than fewer long holds when your wrists are sensitive.
Practice on a Softer Surface: If your mat is very thin, adding a blanket or practicing on carpet can reduce wrist discomfort. The slight give absorbs some of the pressure that would otherwise transfer directly to your wrist joints.
Signs You Need More Wrist Strength Before Progressing
One thing no competitor covers is how to know when you are ready to progress to more challenging arm balances. Pushing past your limits is how injuries happen, but staying in your comfort zone too long stalls your progress. Here are the key signs that tell you to spend more time on wrist strengthening before moving forward.
Sign 1: Your Wrists Shake Uncontrollably. Some trembling is normal when muscles are working hard. But if your wrists shake so much that you cannot maintain alignment, you need more foundational strength. Go back to Phase 1 exercises until the shaking stops.
Sign 2: You Feel Pain After Practice. Muscle soreness in your forearms 24 to 48 hours after practice is normal. Sharp wrist pain that lingers for days is not. If your wrists hurt after every session, you are doing too much too soon.
Sign 3: You Cannot Hold Plank for 30 Seconds. If holding a high plank for 30 seconds feels impossible, your wrists and shoulders are not ready for arm balances. Master the plank first, then move on to more advanced poses.
Sign 4: Your Knuckles Lift Off the Mat. If you cannot keep your knuckles grounded during tabletop or plank, your forearm muscles are not strong enough yet. Work on finger-spread exercises and tabletop weight shifts until you can maintain grounded knuckles.
Sign 5: Pain Radiates Into Your Forearm. If wrist discomfort spreads up into your forearm, you may be developing tendon inflammation. Take a break from weight-bearing poses and focus on stretching and mobility work. Consult a healthcare professional if the pain persists.
Listen to your body. Progress is not linear, and some days your wrists will feel stronger than others. Honor where you are in your practice and trust that consistent, gradual loading will get you where you want to go.
Wrist Prep for Specific Arm Balances
Different arm balances stress your wrists in different ways. Here is how to prepare your wrists for the most common arm balance poses you will encounter in yoga.
Crow Pose (Bakasana)
Crow Pose is usually the first arm balance people try, and it is a great teacher. Your wrists bear most of your body weight in deep extension. Before practicing Crow, warm up with tabletop weight shifts and wrist extension stretches. Place your hands slightly wider than shoulder-width apart and spread your fingers wide. Press firmly through your knuckles, especially the index finger knuckle. Start by resting your knees on your upper arms and shifting your weight forward slowly. Do not try to lift both feet at once. Lift one foot, hold, and lower it back down. This builds wrist tolerance gradually.
Chaturanga Dandasana
Chaturanga is technically not an arm balance, but it is the foundational pose that prepares your wrists and arms for all arm balances. In Chaturanga, your wrists are in extension while supporting your body weight at a 90-degree angle. This is heavy loading. Practice Chaturanga with your knees down until you can lower slowly with control. Keep your elbows hugging in toward your ribs. If your elbows splay out, your wrists take on extra strain. Build up to 3 sets of 5 full Chaturangas before attempting advanced arm balances.
Side Crow (Parsva Bakasana)
Side Crow adds a twist to the Crow Pose position, which means your wrists handle asymmetric loading. One wrist bears more weight than the other as you rotate. Warm up with tabletop twists and seated spinal twists before attempting Side Crow. Make sure your Crow Pose is solid before adding the rotational element. Place your hands slightly wider than you would for regular Crow to give yourself a stable base for the twist.
Handstand (Adho Mukha Vrksasana)
Handstand demands the most wrist strength and stability of any yoga pose. Your wrists are in full extension, bearing 100 percent of your body weight. Before attempting Handstand, you should be able to hold Downward Dog for 60 seconds without wrist pain and hold a high plank for 45 seconds with stable, grounded hands. Start with wall-supported handstands and focus on pressing strongly through your hands. Use the wall to kick up, but keep your weight pressing up and away from the wall once you are up. Engage your fingertips actively, as if you are trying to grip the floor.
Peacock Pose (Mayurasana)
Peacock Pose is unique because your elbows press into your abdomen while your wrists support your body. This requires extreme wrist extension and forearm flexibility. Warm up thoroughly with wrist extension stretches and reverse prayer hands. Practice with your feet on the floor first, lifting only your head and chest. Build wrist extension range gradually, as this pose demands more flexibility than any other arm balance.
FAQs
How to build strength for yoga arm balances?
Build strength for yoga arm balances by starting with foundational poses like tabletop, plank, and wall push-ups. Gradually progress to Downward Dog holds and Chaturanga with knees down. Practice 3 to 5 times per week, warming up your wrists for at least 3 minutes before each session. Add finger-spread exercises and grip work to build forearm strength. Most students see noticeable improvement in 8 to 12 weeks of consistent practice.
How to build strength in wrists for yoga?
Build wrist strength for yoga with these 5 exercises: 1) Wrist circles for joint mobility, 2) Prayer pose stretch for flexion range, 3) Tabletop weight shifts for controlled loading, 4) Finger spreads for grip strength, and 5) Wall push-ups for progressive wrist extension. Do these daily before practice, starting with 10 repetitions each and increasing gradually.
How to make arm wrist stronger?
Make your wrists and arms stronger by combining yoga practice with targeted exercises. Practice plank holds, Downward Dog, and Chaturanga to build wrist tolerance. Add reverse wrist curls with light dumbbells, dead hangs from a pull-up bar, and squeezing a grip-strengthening ball. Aim for 4 to 5 sessions per week, with at least one rest day. Expect gradual improvement over 2 to 3 months of consistent training.
How long does it take to build wrist strength for yoga?
Building wrist strength for yoga typically takes 8 to 12 weeks of consistent practice. Beginners who practice wrist exercises 4 to 5 times per week usually notice reduced pain in Downward Dog within 3 to 4 weeks. Significant strength gains for arm balances like Crow Pose generally take 2 to 3 months. Advanced poses like Handstand may require 6 months or more of dedicated wrist and shoulder conditioning.
Conclusion
Learning how to build wrist strength for yoga arm balances is a journey that requires patience, consistency, and respect for your body. Start with a thorough warm-up before every practice. Focus on proper hand placement with grounded knuckles and active fingertips. Follow the progressive strengthening routine from tabletop holds all the way to arm balance prep poses. Listen to your body and use modifications when needed.
Your wrists will adapt and grow stronger if you give them the right stimulus and enough time to recover. Trust the process, stay consistent, and before long you will find yourself floating into Crow Pose with strong, stable, pain-free wrists.