
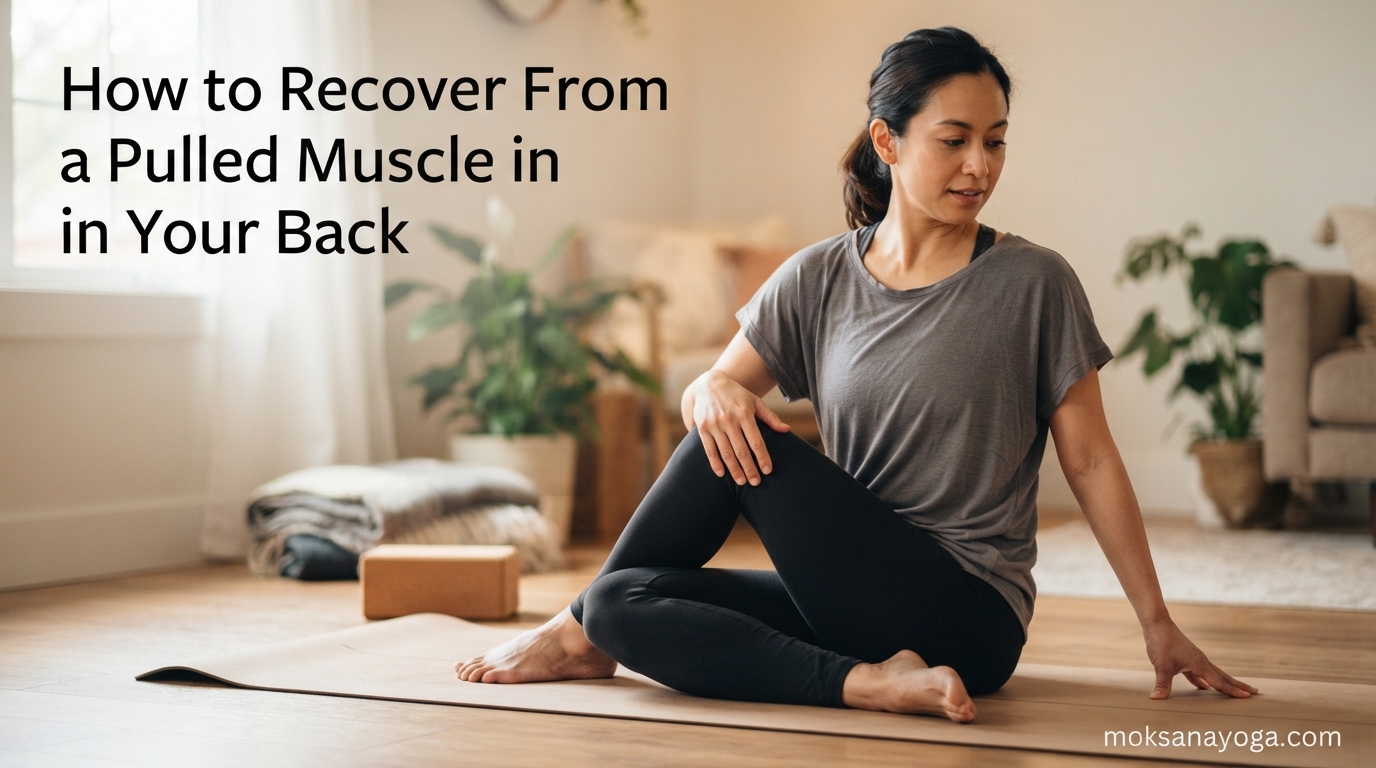
You bent down to pick up something light, a laundry basket maybe, and suddenly your back seized. That sharp, breath-catching pain told you immediately: something is wrong. If you are reading this with a heating pad wedged behind you, shifting in your chair trying to get comfortable, you are in the right place.
Learning how to recover from a pulled muscle in your back is part science, part patience, and part gentle movement. The good news is that most back strains heal on their own within two weeks when you treat them correctly. The challenging part is that most people do too much too soon, or conversely, stay in bed far longer than they should.
At Moksana Yoga, we have worked with hundreds of students who walked into the studio with back pain from gardening, lifting children, poor desk posture, and yes, even from yoga itself done without proper form. We have seen what works and what prolongs recovery. Our approach blends evidence-based medical guidance with the wisdom of yoga, because your back deserves both precision and compassion.
This guide walks you through every phase of recovery, from the first 48 hours of ice and rest, through the gentle movement phase, all the way to preventing the next injury. We include specific yoga poses that support healing, the poses you should absolutely avoid while injured, and the breathing techniques that help you manage pain without relying solely on medication.
Whether you pulled a muscle reaching for a shelf, twisting during a tennis match, or simply getting out of bed the wrong way, the path forward is the same. Let us walk it together, one mindful step at a time.
Table of Contents
Quick Recovery Summary: Your Roadmap Back to Movement
If you only have thirty seconds, here is the essential framework for recovering from a pulled back muscle. The full article below explains each phase in detail, but this summary gives you the foundation right now.
Phase 1 (First 48 hours): Rest briefly but do not take to your bed for days. Apply ice for 15 to 20 minutes every 2 to 3 hours. Take over-the-counter NSAIDs like ibuprofen or naproxen if you tolerate them well. Avoid stretching, heat, and strenuous movement during this acute inflammation window.
Phase 2 (Days 3 through 14): Transition from ice to heat therapy. Begin gentle movement like short walks. Start carefully with restorative yoga poses like child’s pose and cat-cow. Gradually increase activity as pain allows. The principle here is simple: motion is lotion.
Phase 3 (Weeks 2 through 6): Resume normal activities progressively. Add core strengthening. Continue a gentle yoga practice. Focus on prevention through proper body mechanics and regular stretching.
See a doctor immediately if: You experience numbness or tingling in your legs, loss of bowel or bladder control, pain that radiates down your leg, fever alongside back pain, or pain that worsens after two weeks instead of improving.
Now let us explore each phase in depth, starting with understanding what actually happened inside your back.
What Is a Pulled Back Muscle?
A pulled back muscle, medically known as a back strain, occurs when the muscles or tendons supporting your spine are stretched beyond their normal range and sustain microscopic tears. These tears can range from minor, where only a few muscle fibers are damaged, to severe, where the muscle or tendon tears partially or completely.
Your back contains a complex network of muscles. The erector spinae group runs along your spine and helps you stand upright. The latissimus dorsi, the broadest muscle in your back, supports arm movement. The quadratus lumborum connects your pelvis to your spine and helps you bend sideways. The multifidus, a deep stabilizing muscle, supports each spinal segment. Any of these muscles can be strained, though the lower back (lumbar region) is the most common site of injury.
When muscle fibers tear, your body responds with inflammation. Blood flow increases to the area, bringing nutrients and cells needed for repair. This inflammation causes swelling, which presses on nerve endings and creates the pain you feel. Muscle spasms often follow as your body attempts to splint and protect the injured area. This is why your back can feel locked or frozen after a strain.
Strain vs Sprain: Knowing the Difference
People use these terms interchangeably, but they describe different injuries. A back strain involves damage to muscles or tendons (the tissues that connect muscle to bone). A back sprain involves damage to ligaments (the tissues that connect bones to each other at joints).
The practical difference matters for treatment and recovery. Strains are more common in the back because the muscles bear the brunt of daily mechanical stress. Sprains tend to occur with sudden, forceful movements that overload spinal joints. Both injuries produce similar symptoms, including pain, stiffness, and reduced range of motion, which is why even medical professionals sometimes need imaging to distinguish between them.
For the purposes of recovery, the treatment approach for strains and mild sprains is essentially the same. Rest briefly, ice first, transition to heat, move gently, and rebuild strength gradually.
Muscle Strain Grades: Understanding Severity
Medical professionals classify muscle strains into three grades based on severity. Knowing which grade you are dealing with helps set realistic expectations for your recovery timeline.
Grade 1 (Mild): A small number of muscle fibers are stretched or slightly torn. You feel pain and stiffness, but can still move, though uncomfortably. There is no significant loss of strength. Most everyday back strains fall into this category, and recovery typically takes 1 to 2 weeks.
Grade 2 (Moderate): A larger number of muscle fibers are torn, causing more significant pain, noticeable swelling, muscle spasms, and reduced strength. You will likely have difficulty bending, twisting, or standing fully upright. Recovery usually takes 2 to 4 weeks with proper care.
Grade 3 (Severe): The muscle or tendon is completely ruptured. This is a serious injury that causes intense pain, severe swelling, visible bruising, and significant loss of function. Grade 3 strains require medical evaluation and may need surgical repair. Recovery takes 6 weeks or longer.
Most people reading this guide are dealing with Grade 1 or Grade 2 strains. If you suspect a Grade 3 injury, please see a doctor rather than attempting self-treatment.
Common Causes of Pulled Back Muscles
Back strains rarely happen randomly. They almost always trace back to a specific mechanism of injury, and understanding yours helps you avoid repeating it.
Lifting with poor form is the single most common cause. Bending at the waist instead of the knees places enormous load on the lower back muscles. Lifting something heavy while simultaneously twisting multiplies the risk exponentially.
Sudden awkward movements catch muscles off guard. A quick twist to catch a falling object, an unexpected sneeze, or a jolt from tripping can all overload back muscles that were not braced for the movement.
Sports and exercise contribute their share. Weightlifting with poor form, explosive movements in tennis or golf, and yes, even yoga done aggressively can strain back muscles. Pushing too deeply into a pose, or attempting a pose your body is not ready for, are common culprits we see in the studio.
Repetitive strain builds slowly. Gardeners, dental hygienists, mechanics, and anyone who performs the same movements repeatedly can develop strains over time. The muscles fatigue and eventually tear under accumulated stress.
Poor posture and prolonged sitting weaken back muscles over months and years. Weak muscles are more susceptible to acute injury when suddenly asked to perform a demanding task like lifting a heavy box or moving furniture.
Risk Factors That Increase Your Chances
Certain factors make back strains more likely. Being aware of yours helps you take preventive action before the next injury.
Weak core muscles top the list. Your core acts as an internal corset that supports your spine. When it is weak, your back muscles take on more load than they are designed for. We address this directly in our yoga sequences later in this guide.
Tight hamstrings and hip flexors pull on the pelvis and alter spinal mechanics, forcing back muscles to compensate. This is why stretching is not just for flexibility but for injury prevention.
Excess body weight particularly around the midsection, shifts your center of gravity forward and forces back muscles to work harder constantly.
Smoking reduces blood flow to spinal tissues and impairs healing. It also reduces bone density over time, compounding back problems.
Age plays a role. As we get older, muscles lose elasticity and strength, making them more prone to strains. However, regular exercise and yoga can significantly offset this decline.
Signs and Symptoms of a Pulled Back Muscle
Recognizing a pulled back muscle accurately is the first step toward proper treatment. Most strains announce themselves clearly, though the symptoms can overlap with other conditions, which we will address shortly.
Sudden onset pain is the hallmark sign. Unlike chronic back pain that builds gradually, a strain typically hits during or immediately after a specific movement. You can usually identify the exact moment it happened.
Dull, aching pain localized to one area of the back is typical. The pain may intensify with specific movements like bending, twisting, or standing up from a seated position. Unlike nerve pain, muscle strain pain stays in the back rather than traveling down your leg.
Muscle spasms are extremely common after a strain. These involuntary contractions can range from mild twitching to severe, painful locking. Spasms are your body’s protective mechanism, attempting to immobilize the injured area. They often come in waves and can be more painful than the original injury.
Stiffness and reduced range of motion develop quickly. You may find it difficult to fully straighten up, bend forward, or twist your torso. Simple tasks like putting on socks or getting out of a car become challenges.
Tenderness to touch helps confirm the location. Pressing gently on the injured muscle will reproduce the pain. You may also feel tightness or a hard knot under the skin where the muscle is in spasm.
Mild swelling may be present in the first 24 to 48 hours due to inflammation. In some cases, you might notice slight bruising, though this is more common with Grade 2 or 3 strains.
Pain that worsens with movement and improves with rest is a key distinguishing feature. If your pain is constant regardless of position, or if it is actually worse at rest, the cause may be something other than a simple muscle strain.
Right Side vs Left Side Back Pain
Many people search specifically for right side or left side back pain, wondering if the side matters. For a muscle strain, the side simply indicates which muscle group was overloaded during the injuring movement. A right-handed person lifting awkwardly may strain the right side. A golfer’s follow-through may strain the left.
However, one-sided back pain can sometimes indicate kidney issues (kidney stones, infections) when accompanied by other symptoms like urinary changes or fever. This is one reason the “When to See a Doctor” section later in this guide matters.
When It Is More Than a Strain
Several conditions can mimic a pulled back muscle. Knowing the differences helps you determine whether self-treatment is appropriate or whether you need medical evaluation.
A herniated disc occurs when the soft inner material of a spinal disc pushes through its outer layer and presses on nearby nerves. The telltale sign is pain that radiates down your leg, often below the knee, accompanied by numbness, tingling, or weakness. If you feel shooting pain down your leg, suspect a disc issue rather than a muscle strain.
Sciatica is nerve pain that follows the path of the sciatic nerve, running from your lower back through your buttocks and down each leg. It causes a distinctive burning or electric shock sensation. Sciatica is often caused by a herniated disc or spinal stenosis compressing the nerve.
Kidney stones cause severe flank pain that comes in waves and may radiate to the lower abdomen or groin. The pain typically does not change with movement, unlike muscle strain pain. Blood in the urine, nausea, and difficulty urinating are additional warning signs.
Spinal stenosis is a narrowing of the spinal canal that compresses nerves. It typically causes pain, numbness, or weakness that worsens with walking and improves with sitting or leaning forward. This condition is more common in people over 60.
Muscle spasm without strain can occur from dehydration, electrolyte imbalances, or simple overexertion. These spasms tend to resolve within hours or a day and do not involve actual muscle fiber damage.
If your symptoms match any of the descriptions above, particularly the nerve-related symptoms, please consult a healthcare provider rather than self-treating as a muscle strain.
How Long Does a Pulled Back Muscle Take to Heal?
This is the question we hear most often in the studio, and the honest answer is: it depends on severity. But we can give you clear benchmarks to set realistic expectations.
Grade 1 (mild strain): Most people recover fully within 1 to 2 weeks. Pain typically peaks in the first 48 hours, then gradually diminishes. You should notice meaningful improvement by day 3 or 4 and significant progress by the end of week one.
Grade 2 (moderate strain): Recovery takes 2 to 4 weeks. The first week is the most painful and restrictive. By week two, you should be able to move more freely and start gentle stretches. Full recovery, including return to all activities, may take an additional week or two.
Grade 3 (severe strain): Recovery takes 6 to 12 weeks and may require medical intervention. These injuries sometimes need physical therapy, and in rare cases, surgery.
Reddit users in communities like r/backpain and r/Fitness consistently report timelines that align with these benchmarks. The consensus there is that typical lower back pain ranges from 2 to 6 weeks, with some recovering faster and others taking longer. This variability is normal.
Several factors influence your personal timeline. Younger people heal faster. Those with strong core muscles and good fitness levels tend to recover more quickly. Following proper treatment protocols, especially avoiding prolonged bed rest, significantly speeds recovery. Conversely, pushing too hard too soon, or ignoring the injury entirely, prolongs healing.
If your pain has not improved after two weeks of self-care, or if it is getting worse, it is time to see a doctor. Persistent pain beyond the expected timeline may indicate a more serious injury than initially thought.
Phase 1: First 48 Hours After Injury
The first 48 hours after a back strain set the trajectory for your entire recovery. What you do, and equally important, what you avoid during this window, can mean the difference between a one-week recovery and a six-week ordeal.
The goal during Phase 1 is simple: control inflammation, manage pain, and avoid aggravating the injury. This is not the time for stretching, heat, or pushing through discomfort. Think of it as creating the right conditions for your body’s natural healing process to work efficiently.
Step 1: Stop and assess. When the injury happens, stop whatever you were doing. Do not try to push through the pain or finish the task. Continuing to move with a strained muscle risks turning a Grade 1 injury into a Grade 2.
Step 2: Find a comfortable position. Lie on your back on a firm surface with a pillow under your knees, or lie on your side with a pillow between your knees. These positions reduce pressure on the lower back. Avoid soft, saggy mattresses that let your spine curve unnaturally.
Step 3: Apply ice immediately. Cold therapy reduces inflammation, numbs pain, and decreases muscle spasms. Use an ice pack, a bag of frozen peas, or crushed ice wrapped in a thin towel. Never apply ice directly to bare skin.
Step 4: Take NSAIDs if appropriate. Over-the-counter nonsteroidal anti-inflammatory drugs like ibuprofen (Advil, Motrin) or naproxen (Aleve) reduce both pain and inflammation. Acetaminophen (Tylenol) addresses pain but not inflammation. Follow package instructions and consult a pharmacist if you take other medications.
Step 5: Move gently and briefly. After the first few hours of rest, begin getting up and walking slowly for a minute or two every hour. This prevents stiffness and promotes blood flow. Think of it as testing the waters, not exercising.
How to Apply Ice Correctly
Proper ice application maximizes benefits and prevents skin damage. The protocol is straightforward but worth doing correctly.
Apply ice for 15 to 20 minutes at a time, then remove it for at least 2 hours before reapplying. This timing allows your skin and underlying tissues to return to normal temperature, preventing cold injury. You can repeat this cycle up to 5 or 6 times during the first 48 hours.
Always wrap ice in a cloth barrier. A thin towel works well. Direct skin contact can cause frostbite or nerve damage. If using a commercial gel pack, follow the manufacturer’s instructions and never exceed the recommended application time.
You will feel the cold in stages: first cold, then burning, then aching, then numbness. The numbing phase is your goal. Once the area is numb, the ice has done its job for that session.
What to Avoid During the First 48 Hours
Knowing what not to do is just as important as knowing what to do. Several common mistakes during the acute phase can significantly extend your recovery time.
Avoid heat therapy during the first 48 hours. Heat increases blood flow, which sounds beneficial but actually worsens inflammation and swelling during the acute phase. Save the heating pad for day three.
Avoid stretching the injured muscle. Stretching torn muscle fibers causes more damage. Even gentle stretches that feel good in the moment can set back your healing. Resist the urge to stretch during Phase 1.
Avoid massage of the injured area. Direct pressure on acutely injured muscle increases inflammation and can worsen micro-tears. Gentle massage of surrounding tight muscles is acceptable, but leave the injury site alone.
Avoid alcohol in the first 48 hours. Alcohol increases bleeding and swelling in injured tissues. It also interacts dangerously with many pain medications.
Why Prolonged Bed Rest Hurts Your Recovery
This may be the most important point in this entire guide: prolonged bed rest is one of the worst things you can do for a pulled back muscle. Years ago, doctors prescribed days of bed rest for back injuries. Modern research has completely overturned this advice.
More than 48 hours of bed rest causes muscles to weaken and stiffen. It reduces blood flow to injured tissues, slowing the delivery of nutrients needed for repair. It can lead to blood clots, depression, and a longer overall recovery. The Cleveland Clinic, Harvard Health, and virtually every modern medical authority now recommend returning to gentle movement as quickly as pain allows.
The phrase we love, which one orthopedic clinic coined, is “motion is lotion.” Movement lubricates joints, maintains muscle tone, promotes circulation, and signals to your nervous system that healing is underway. The key is the right type and amount of movement at the right time.
During Phase 1, this means brief, gentle walks of 1 to 2 minutes every hour or two. Not exercise. Not stretching. Just slow, careful movement to keep your body from seizing up. By Phase 2, you will expand this significantly.
Phase 2: Days 3 Through 2 Weeks – Heat, Movement, and Stretching
As you enter day three, the acute inflammation phase should be subsiding. The sharp, constant pain begins to give way to a duller ache that comes and goes with movement. This is your signal that the body has moved past the initial crisis and is ready for active recovery.
Phase 2 shifts your strategy from damage control to rebuilding. You transition from ice to heat, from rest to gentle movement, and from immobility to carefully selected stretches. This is where recovery either accelerates or stalls, depending on how skillfully you progress.
Transitioning from Ice to Heat
After 48 to 72 hours, switch from ice to heat therapy. Heat promotes blood flow, relaxes muscle spasms, and increases tissue flexibility. These effects support the active recovery process that defines Phase 2.
Apply heat using a heating pad, warm compress, hot water bottle, or warm bath. The same time guidelines apply: 15 to 20 minutes per session, with at least 2 hours between applications. A warm bath with Epsom salts (magnesium sulfate) is particularly effective because warm water surrounds the entire back and the magnesium may help relax muscles.
Some people benefit from alternating hot and cold therapy, spending 3 minutes with heat followed by 1 minute with cold, repeating for 15 to 20 minutes total. This contrast therapy can stimulate circulation and reduce lingering inflammation. Listen to your body and use whichever approach provides the most relief.
Ice vs Heat: When to Use Each
The ice versus heat question comes up constantly, and the answer depends entirely on timing and symptoms.
Use ice during the first 48 to 72 hours after injury, when inflammation and swelling are at their peak. Ice is also appropriate later in recovery if you experience a flare-up after overdoing activity. Signs that ice is the right choice include swelling, warmth in the area, and acute, sharp pain.
Use heat after the acute phase (day 3 onward) when the goal shifts from reducing inflammation to promoting blood flow and relaxation. Heat is ideal for muscle spasms, chronic stiffness, and preparing muscles for gentle stretching. Signs that heat is appropriate include muscle tightness, dull aching pain, and stiffness rather than sharp pain.
Never use heat on a new injury within the first 48 hours. Never apply ice immediately before stretching, as cold tissues are less flexible and more prone to tearing. The general rule: ice for inflammation, heat for stiffness.
Gentle Movement: The Key to Phase 2 Recovery
During Phase 2, gradually increase your daily activity. The goal is to challenge your healing back without aggravating it. This requires attention and honesty about how you feel.
Walking is the best starting point. Begin with 5 to 10 minute walks on flat ground. Walk slowly and pay attention to your posture. If walking feels good, gradually increase duration by a few minutes each day. Walking promotes circulation, maintains mobility, and gently engages core muscles.
Light daily activities like cooking, light housework, and gentle errands are appropriate as long as they do not cause sharp pain. Avoid lifting anything heavy, and always use proper body mechanics when bending or reaching.
Isometric exercises can begin around day 3 to 5, depending on pain levels. An isometric contraction involves tensing a muscle without moving the joint. Harvard Health recommends gently contracting the injured muscle for about 30 seconds at a time. This promotes normal muscle function without the risk of overstretching healing fibers.
Gentle yoga can begin around day 5 to 7 for Grade 1 strains, or day 10 to 14 for Grade 2 strains. We provide a complete sequence later in this guide. The key word here is gentle. This is not the time for your regular vinyasa class.
Monitor your pain response carefully. Mild discomfort during movement is normal and acceptable. Sharp pain, increased pain after activity, or pain that is worse the next morning are all signals that you are progressing too quickly. Scale back and give your body more time.
The Two-Day Rule for Activity Progression
When increasing activity during Phase 2, follow a simple two-day rule. Try a slightly more challenging activity one day, then wait 24 hours to assess your response. If you feel the same or better the next day, you can continue at that level.
If you wake up stiffer or more painful, you overdid it. Scale back to the previous level for another few days before trying again. This method prevents the common cycle of progress followed by painful setbacks that can extend recovery by weeks.
Pain Management Options
Pain management during back muscle recovery serves two purposes: keeping you comfortable and enabling the gentle movement that promotes healing. The goal is not to eliminate all pain but to reduce it to a level where you can participate actively in your recovery.
Oral Pain Relievers
NSAIDs (nonsteroidal anti-inflammatory drugs) are the first-line choice for muscle strain pain because they address both pain and inflammation. Ibuprofen (Advil, Motrin) and naproxen (Aleve) are the most common options. They are most effective during the first week when inflammation is active.
Take NSAIDs with food to protect your stomach, and follow package dosing instructions carefully. Do not combine multiple NSAIDs, and consult a healthcare provider if you have kidney problems, heart disease, stomach ulcers, or take blood thinners.
Acetaminophen (Tylenol) is an alternative for those who cannot take NSAIDs. It reduces pain but has no effect on inflammation. Some people find that alternating acetaminophen with an NSAID provides better pain relief than either alone.
Muscle relaxants may be prescribed by a doctor for severe muscle spasms. These medications can cause drowsiness, so take them only at night or when you do not need to drive. They are typically used short-term during the most painful phase.
Topical Pain Relief
Topical treatments provide localized pain relief without the systemic effects of oral medications. They are a good option for people who prefer to minimize oral medication use.
Creams and gels containing menthol, camphor, or capsaicin create sensations of cold, warmth, or mild heat that distract from pain signals. Apply them to the skin over the injured area, following package directions.
Topical NSAIDs like diclofenac gel (Voltaren) deliver anti-inflammatory medication directly to the injured area with less systemic absorption than oral forms. These are available over the counter in many countries.
lidocaine patches provide numbing relief for particularly painful areas. They can be worn for up to 12 hours at a time and are useful for getting through the day or sleeping more comfortably.
Self-Massage with a Tennis Ball
One of our favorite self-care techniques for back muscle recovery is tennis ball massage. It is simple, inexpensive, and surprisingly effective for releasing muscle tension and spasms in the back and surrounding areas.
Step 1: Lie on your back on a firm but comfortable surface, like a yoga mat on the floor.
Step 2: Place a tennis ball under your back, positioned on the tight or tender muscle. Avoid placing it directly on your spine; target the muscles on either side.
Step 3: Use your body weight to apply gentle pressure. Breathe deeply and allow the muscle to relax around the ball. Hold for 30 to 60 seconds on each tender spot.
Step 4: Move slowly, rolling the ball along the muscle. Pause wherever you feel a tight band or knot. Spend 5 to 10 minutes total per session.
Do not use tennis ball massage during the first 48 hours after injury. After that, it can be a valuable tool for releasing the protective muscle tension that develops after a strain. If direct pressure on the injured muscle is too painful, work on the surrounding muscles instead, particularly the glutes and upper back.
Foam Roller Techniques
A foam roller offers similar benefits to tennis ball massage but covers a larger area. Use it on the muscles surrounding the injured area rather than directly on the strain itself, especially during early recovery.
Roll slowly along the length of the muscle, pausing on tight spots for 20 to 30 seconds. Breathe deeply and avoid tensing against the pressure. For back recovery, focus on the upper back, lats, and glutes rather than rolling directly over the lumbar spine.
Foam rolling works best as a Phase 2 and beyond practice. Once the acute pain has subsided and you are moving more freely, a few minutes of daily rolling can prevent the stiffness that slows recovery.
Gentle Yoga Poses for Back Muscle Recovery
This is where our perspective at Moksana Yoga differs from every medical resource ranking for this topic. Cleveland Clinic, Harvard Health, and HealthPartners all give excellent medical advice for recovering from a back strain. But none of them frame recovery through the lens of yoga, and none provide a structured yoga sequence designed specifically for each phase of healing.
We have spent years working with students recovering from back injuries. The sequence below represents what we have found most effective: poses that gently restore mobility, release muscle tension, and rebuild the core support that prevents re-injury. None of these poses should cause sharp pain. If they do, stop and wait a few more days before trying again.
Child’s Pose (Balasana)
This is the foundation pose of back recovery. Child’s pose gently stretches the lower back, releases tension along the spine, and provides a safe, supported position that almost always feels good when your back is recovering.
How to practice: Start on your hands and knees. Bring your knees wider than your hips and bring your big toes to touch. Sink your hips back toward your heels. Walk your hands forward and rest your forehead on the floor or a pillow. Breathe deeply into your lower back, feeling it gently expand with each inhale. Hold for 1 to 3 minutes.
Modifications: If your hips do not reach your heels, place a pillow or folded blanket between your thighs and calves. If your forehead does not comfortably reach the floor, rest it on a bolster or stacked fists. The goal is complete comfort and relaxation, not depth.
When to use it: Child’s pose can be introduced as early as day 3 to 5 for Grade 1 strains, as long as it causes no sharp pain. For Grade 2 strains, wait until day 7 to 10. This pose is appropriate throughout the entire recovery process and beyond.
Cat-Cow (Marjaryasana-Bitilasana)
This gentle flowing movement warms up the entire spine, restores mobility to stiff back muscles, and encourages healthy spinal fluid circulation. It is the perfect transition from static rest to active movement.
How to practice: Start on your hands and knees with your wrists under your shoulders and knees under your hips. Inhale and drop your belly, lift your chest and tailbone (Cow pose). Exhale and round your spine toward the ceiling, tucking your chin and tailbone (Cat pose). Move slowly, matching each movement to your breath. Continue for 5 to 10 rounds.
Modifications: Move through a smaller range of motion than usual. Do not push into the deepest arch or the deepest round. Think of it as gently massaging your spine rather than maximizing the stretch. If your knees are sensitive, place a folded blanket under them.
When to use it: Cat-cow can begin around day 5 to 7 for Grade 1 strains. For Grade 2 strains, wait until day 10 to 14. Always start with very small movements and gradually increase the range as comfort allows.
Knees-to-Chest (Apanasana)
This pose gently decompresses the lower back and provides a soothing stretch to the lumbar muscles. It is one of the most reliable poses for immediate lower back relief.
How to practice: Lie on your back. Draw one knee toward your chest, holding behind the thigh. Then draw the other knee up. Wrap your hands around both shins or behind both thighs. Rock gently from side to side, massaging your lower back against the floor. Hold for 1 to 2 minutes, breathing steadily.
Modifications: If drawing both knees in is too intense, hold one knee at a time and let the other leg stay extended. Place a pillow under your head if your neck feels strained.
When to use it: Knees-to-chest is one of the first stretches safe to introduce, typically around day 5 to 7 for mild strains. It is gentle, controlled, and lying down provides full spinal support.
Bridge Pose (Setu Bandhasana)
Bridge pose strengthens the glutes, hamstrings, and lower back muscles while gently opening the front of the body. It introduces strengthening into your recovery sequence, which is essential for long-term healing and injury prevention.
How to practice: Lie on your back with your knees bent and feet flat on the floor, hip-width apart. Press through your feet and slowly lift your hips. Engage your glutes and thighs. Hold for 3 to 5 breaths, then lower slowly. Repeat 3 to 5 times.
Modifications: Keep the lift small, especially in the early stages. You do not need to lift high; even an inch or two off the floor engages the right muscles. If bridge causes any lower back pain, skip it and focus on the previous three poses until you are further along in recovery.
When to use it: Bridge pose is a Phase 2 or Phase 3 addition. For Grade 1 strains, introduce it around day 10 to 14. For Grade 2 strains, wait until week 3 or 4. Bridge is a strengthening pose, not a resting pose, so it should come after the gentle stretches above.
A Gentle Recovery Sequence
Once you are cleared for gentle yoga (no sharp pain, pain diminishing daily, able to walk comfortably), try this 15-minute sequence. It flows from gentlest to slightly more active, giving your back time to warm up before any strengthening.
Minutes 1 to 3: Begin in child’s pose. Breathe slowly and deeply. Allow your back to relax completely.
Minutes 3 to 6: Transition to hands and knees. Move through cat-cow slowly for 10 rounds. Return to child’s pose for 3 breaths.
Minutes 6 to 9: Lie on your back. Draw knees to chest and rock gently side to side. Extend one leg at a time to test mobility.
Minutes 9 to 12: If comfortable, add 3 to 5 gentle bridge poses. Keep the lift small and controlled.
Minutes 12 to 15: Return to knees-to-chest. Finish with 1 minute of complete stillness, lying flat with knees bent and feet on the floor. Notice how your back feels.
Practice this sequence once daily during Phase 2 recovery. As your back improves, you can gradually expand into a fuller practice, always listening to your body’s signals.
Yoga Poses to Avoid During Recovery
This section exists because we kept seeing the same question on r/yoga: “What poses should I avoid with a back injury?” No medical resource covers this, but it is critical for anyone with a yoga practice. Doing the wrong pose at the wrong time can set your recovery back significantly.
Avoid deep forward folds like standing forward fold (Uttanasana) and seated forward fold (Paschimottanasana). Forward folds place significant stretch on the lower back muscles. When those muscles are healing from a strain, deep forward folding risks re-tearing fibers. If you must fold forward, bend your knees deeply and stop at the first sign of stretch in the lower back. As one r/yoga user wisely put it: always bend your knees before you forward fold.
Avoid deep backbends like upward-facing bow (wheel pose), camel pose, and full cobra. These poses require strong, flexible back muscles and place compressive force on the lumbar spine. They have no place in early or mid-recovery.
Avoid twists like revolved triangle, revolved side angle, and deep seated twists. Twisting motions stress the muscles and ligaments that stabilize the spine. During recovery, even gentle twisting can aggravate a healing strain.
Avoid vigorous vinyasa flows that include chaturanga, jump-throughs, or rapid transitions. These dynamic movements load the back muscles unpredictably. Save your full practice for when you are fully recovered.
Avoid inversions like headstand and shoulderstand if they are part of your practice. The neck and upper back are not the primary injury site, but inversions require total body stability that you cannot provide during recovery.
The general principle: avoid poses that involve deep stretching, strong muscular effort, or rapid movement in the back. Favor poses that are supported, gentle, and breath-led. Your practice will be waiting for you when your back is ready.
Breathwork and Mindfulness for Pain Management
This is another area where our yoga perspective adds something the medical resources do not cover. Pain is not purely a physical experience. It involves your nervous system, your emotional state, and your mental focus. Breathwork and mindfulness directly address these dimensions of recovery.
When you are in pain, your breath becomes shallow and rapid. This triggers a stress response: elevated heart rate, increased muscle tension, and heightened pain sensitivity. It becomes a cycle where pain causes stress, stress increases muscle tension, and muscle tension increases pain.
Conscious breathing breaks this cycle. Slow, deep breathing activates the parasympathetic nervous system, reduces muscle tension, and lowers perceived pain intensity. This is not a substitute for physical treatment but a powerful complement to it.
Diaphragmatic Breathing for Pain Relief
Diaphragmatic breathing, also called belly breathing, is the foundation of yogic breath practice (pranayama). It is simple, requires no equipment, and can be practiced anywhere, even lying in bed.
How to practice: Lie on your back with your knees bent. Place one hand on your belly and one on your chest. Breathe in slowly through your nose, directing the breath into your belly so that your lower hand rises while your upper hand stays still. Exhale slowly through your nose. Aim for a count of 4 on the inhale and 6 on the exhale. Practice for 5 to 10 minutes.
The longer exhale is key. It triggers the relaxation response more effectively than equal-length breathing. Practice this technique during acute pain episodes, before stretching, and before bed to improve sleep quality.
The Mental and Emotional Side of Recovery
Recovering from a back injury takes a psychological toll that rarely gets discussed. Reddit users in r/backpain and r/yoga frequently express anxiety about re-injury, frustration with the slow pace of healing, and sadness about missing their normal activities. One user wrote plaintively: “Please tell me I will not have to quit yoga because of my pulled muscle.”
These feelings are valid and normal. Acknowledging them is part of the healing process. Here is what we tell our students:
Your body is not broken. A pulled muscle is a temporary setback, not a permanent condition. Most people recover fully and return to all their previous activities. The fear of re-injury is natural but should not keep you from moving forward when your body is ready.
Use your recovery time to deepen aspects of your practice that you normally rush past. Explore breathwork. Practice meditation. Study the philosophy of yoga. These elements are every bit as valuable as the physical practice, and they are always available to you regardless of your back’s condition.
Connect with others who have been through similar experiences. Online communities like r/backpain and r/yoga offer perspectives from people who understand what you are going through. Reading recovery stories can provide hope and practical tips during difficult days.
When to See a Doctor
Most pulled back muscles heal on their own with the self-care described in this guide. However, certain symptoms signal that something more serious may be happening and require professional medical evaluation.
Red flag symptoms that need immediate medical attention:
Numbness, tingling, or weakness in your legs or feet. These symptoms suggest nerve involvement, which could indicate a herniated disc or other spinal issue rather than a simple muscle strain.
Pain that radiates from your back into your buttocks, thigh, or below the knee. This pattern, especially when accompanied by numbness or tingling, suggests sciatic nerve compression.
Loss of bowel or bladder control, or numbness in your genital area. These are signs of cauda equina syndrome, a rare but serious condition requiring emergency treatment.
Fever accompanying back pain. This combination could indicate an infection.
Severe pain that began with significant trauma, like a car accident or fall from height. Imaging may be needed to rule out fractures or other structural damage.
Unexplained weight loss along with back pain. This combination warrants investigation to rule out more serious underlying conditions.
When to schedule a non-urgent appointment:
Pain that has not improved after two weeks of self-care. While some Grade 2 strains take 3 to 4 weeks, you should see steady improvement by the end of week two. Stagnant or worsening pain needs evaluation.
Pain that keeps you from sleeping despite using pain management strategies. Sleep is critical for healing, and persistent sleep disruption needs to be addressed.
Recurring back strains in the same area. If you keep pulling the same muscle, there may be an underlying weakness or biomechanical issue that a physical therapist can help address.
Back pain with no clear cause or mechanism of injury. Pain that appears without any physical incident needs investigation to determine the underlying cause.
When you do see a doctor, be prepared to describe the onset of pain, what makes it better or worse, and what self-care you have already tried. This information helps them make an accurate diagnosis and recommend appropriate treatment.
How to Prevent Future Back Strains
Recovering from one pulled back muscle is enough. The goal now is to never experience another one. Prevention comes down to three pillars: building strength, improving flexibility, and practicing smart body mechanics.
Build Core Strength
A strong core is your back’s best defense against injury. Your core includes not just your abdominal muscles but also your back muscles, diaphragm, and pelvic floor. Together, they form a supportive cylinder around your spine.
Once you have fully recovered, incorporate core-focused yoga poses into your regular practice. Plank pose, boat pose, and forearm plank build abdominal strength. Locust pose (Salabhasana) strengthens the back extensor muscles. Practice these regularly to build the muscular support that prevents strains.
As one r/yoga contributor noted, deep core exercises were more helpful for back pain than stretching alone. Both matter, but strength provides the foundation that flexibility builds upon.
Maintain Flexibility
Tight muscles are more prone to tearing. Regular stretching of the hamstrings, hip flexors, and back muscles keeps them supple and resilient. A consistent yoga practice is one of the best ways to maintain full-body flexibility.
Focus especially on the hamstrings, which attach to the pelvis and directly influence lower back mechanics. Tight hamstrings pull the pelvis backward, flattening the lower back curve and forcing back muscles to work harder. Downward-facing dog, seated forward folds (when healthy), and standing forward bends all stretch the hamstrings effectively.
Practice Proper Body Mechanics
How you move through daily life matters as much as how you exercise. Most back strains happen during ordinary activities done with poor mechanics.
Lift properly: Bend at the knees and hips, not the waist. Keep the object close to your body. Never twist while lifting. If something is too heavy, ask for help.
Sit mindfully: If you sit for long periods, use a chair with good lumbar support. Stand up and walk for two minutes every hour. Consider a standing desk for part of the day.
Sleep well: A supportive mattress makes a significant difference. If you sleep on your side, place a pillow between your knees. If you sleep on your back, place a pillow under your knees.
Stay active: A sedentary lifestyle weakens back muscles and makes them vulnerable. Even a daily 20-minute walk maintains muscle tone and spinal health.
Build a Sustainable Yoga Practice
One of the most common causes of yoga-related back strain is pushing too hard, too fast. A sustainable practice is not about achieving advanced poses quickly. It is about consistent, mindful practice over years and decades.
Warm up properly before each practice. Listen to your body’s signals. Distinguish between productive stretch and harmful strain. Modify poses when needed. A yoga block, strap, and blanket are not signs of weakness; they are tools for sustainable practice.
If you have a teacher, communicate any injuries or concerns. A skilled teacher can suggest modifications that keep you practicing safely through recovery. If you practice at home, give yourself permission to take a gentler class or skip poses that do not serve your body on a given day.
FAQs
How long does a badly pulled back muscle take to heal?
A badly pulled back muscle (Grade 2 moderate strain) typically takes 2 to 4 weeks to heal with proper care. Mild Grade 1 strains usually resolve in 1 to 2 weeks, while severe Grade 3 strains can take 6 to 12 weeks and may require medical treatment. If pain has not improved after two weeks of self-care, see a doctor.
What is the quickest way to heal a pulled muscle in your back?
The fastest recovery path includes applying ice for 15-20 minutes every 2-3 hours during the first 48 hours, taking NSAIDs like ibuprofen for pain and inflammation, avoiding prolonged bed rest (more than 48 hours), beginning gentle movement like short walks as soon as pain allows, and transitioning to heat therapy and gentle stretches from day 3 onward. Motion is lotion: controlled, gradual movement speeds healing more than rest alone.
How do I tell if I have pulled a muscle in my back?
Signs of a pulled back muscle include sudden pain during a specific movement, dull aching pain that worsens with bending or twisting, muscle spasms, stiffness and reduced range of motion, tenderness when touching the area, and pain that improves with rest. If you feel numbness, tingling, weakness in your legs, or pain radiating below your knee, the issue may be nerve-related rather than a muscle strain.
What can be mistaken for a pulled muscle in the back?
Conditions that mimic a pulled back muscle include herniated discs (causing radiating leg pain, numbness, or tingling), sciatica (burning nerve pain down the leg), kidney stones (severe flank pain with urinary symptoms), spinal stenosis (pain worsening with walking), and muscle spasms from dehydration or electrolyte imbalance. If symptoms include numbness, tingling, leg weakness, fever, or bowel/bladder changes, seek medical evaluation rather than self-treating.
Can yoga help a pulled back muscle?
Yes, gentle yoga can significantly support recovery from a pulled back muscle when practiced at the right time. Restorative poses like child’s pose, cat-cow, and knees-to-chest gently restore mobility and release tension once acute pain subsides (typically day 5-7 for mild strains). However, deep forward folds, backbends, twists, and vigorous flows should be avoided until full recovery. After 12 weeks of consistent gentle yoga practice, many people report reduced chronic back pain.
Should you stretch a pulled back muscle?
Do not stretch a pulled back muscle during the first 48 to 72 hours after injury, as stretching torn muscle fibers causes further damage. After the acute inflammation phase (day 3 onward), very gentle stretches like child’s pose and knees-to-chest can begin if they cause no sharp pain. Always warm up briefly with walking before stretching, never push into pain, and follow the two-day rule: if stretching causes increased pain the next day, scale back.
Is heat or ice better for a pulled back muscle?
Ice is better during the first 48 to 72 hours after injury because it reduces inflammation and numbs pain. Apply ice for 15-20 minutes every 2-3 hours. After 72 hours, transition to heat therapy, which promotes blood flow, relaxes muscle spasms, and prepares tissues for gentle movement. As a general rule: ice for inflammation and sharp pain, heat for stiffness and dull aching. Never use heat on a new injury within the first 48 hours.
Can you walk with a pulled back muscle?
Yes, and you should. Walking is one of the best activities during back muscle recovery because it promotes circulation, maintains mobility, and gently engages core muscles without stressing the injury. During the first 48 hours, take short 1-2 minute walks every hour or two. From day 3 onward, gradually increase to 5-10 minute walks as pain allows. Avoid prolonged bed rest beyond 48 hours, as it weakens muscles and slows recovery.
Moving Forward With Patience and Compassion
Recovering from a pulled muscle in your back asks for two qualities that yoga teaches above all others: patience and self-compassion. Your body knows how to heal. Your role is to create the conditions for that healing, then trust the process.
Follow the phases outlined in this guide. Ice first, then heat. Rest briefly, then move gently. Stretch carefully, never pushing into sharp pain. Add yoga poses progressively, starting with child’s pose and cat-cow before anything ambitious. Listen to the signals your body sends you, and respect them even when you are eager to return to your normal practice.
Remember that knowing how to recover from a pulled muscle in your back is a skill you will carry for life. The same principles of gradual progression, mindful movement, and attentive self-care that guide your recovery will also serve you in preventing the next injury. Your yoga practice will be there when you are ready, and it will be enriched by the wisdom this experience provides.
Breathe. Move gently. Trust your body. We will see you on the mat when you are ready.